In MSD 365 there are only two ways to fetch data – Making Rest Calls or Using FetchXML. For example if we want lookup field value of one entity to be populated in another entity’s value so we can do it easily using REST API CALL.
Now writing the code to make REST API CALL by yourself is slightly tedious , so there is a tool named CRM REST BUILDER introduced that will generate the code for making REST API CALL for any entity and any field. Here’s the link to the same : https://github.com/jlattimer/CRMRESTBuilder
Download the file as it is from github and import the same file in the solutions section by clicking on import solution in Settings -> Solutions.
There are 2 scenarios where we can use REST BUILDER –
- To retrieve single record value
- To retrieve multiple record value
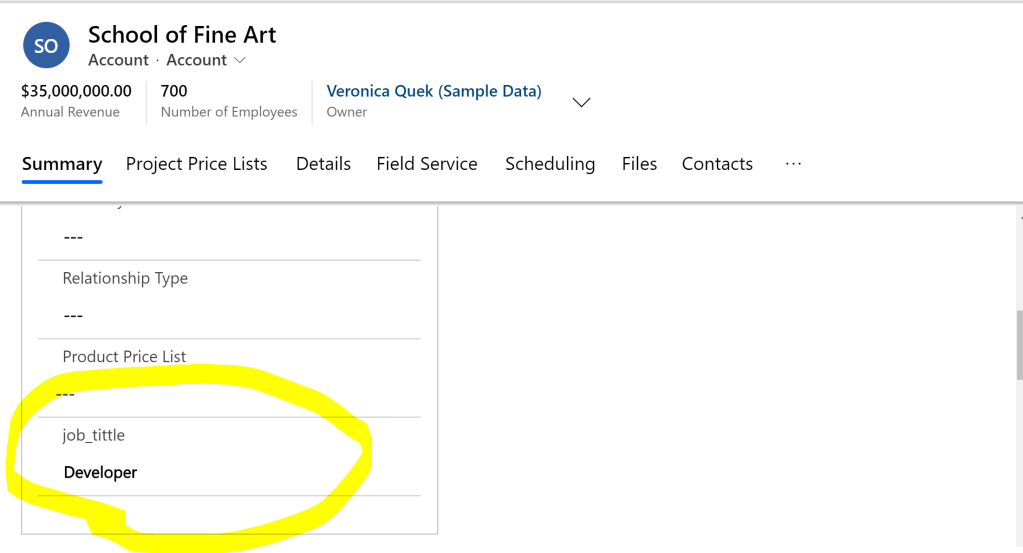
In the first scenario lets take an example where we want to populate a field named “Job_tittle” of a particular account entity with the value field named “Job_tittle”of a contact that is associated/linked with it. As you can see in the images below the following account has a field named “Job_tittle” and also the associated contact has a similar field with a value filled in it.

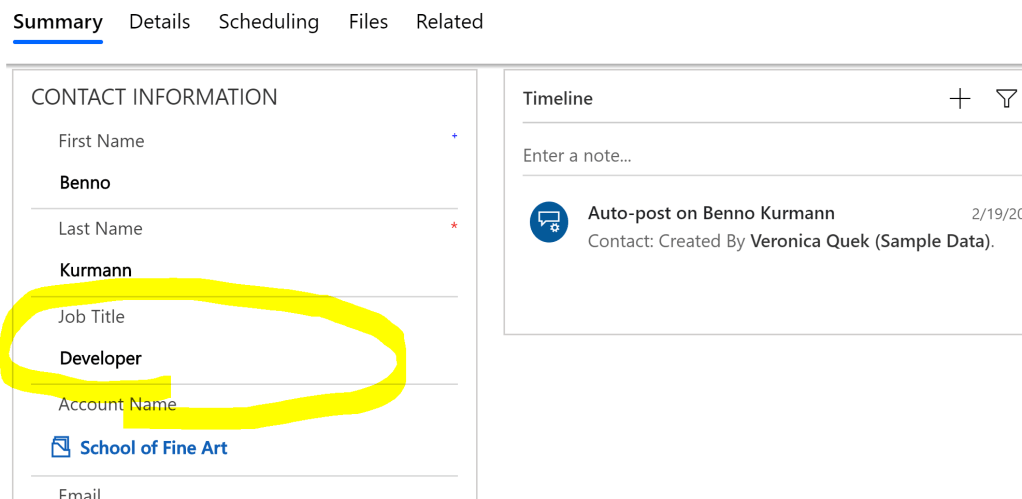
Contact Entity Image
We go to rest builder -> Since we want to retrieve a single record so we will click on “Retrieve Single” and we will select “Synchronous” mode. Difference between synchronous and asynchronous mode is that when a synchronous call is made then after a rest call is made then Entire system will halt until the call is completed and in asynchronous the functionality to be implemented happens to run in background. So as you can see in the below code , we have added the GUID (39a4e5b9-88df-e311-b8e5-6c3be5a8b200)of the contact record in the statement “req.open(“GET”, Xrm.Page.context.getClientUrl() + “/api/data/v9.1/contacts(39a4e5b9-88df-e311-b8e5-6c3be5a8b200)?$select=jobtitle”, false);” and also we have added a statement to update the field value in the innermost if part ie. “formcontext.getAttribute(“new_job_tittle”).setValue(jobtitle);“
function abc(executionContext)
{
var formcontext = executionContext.getFormContext();
var req = new XMLHttpRequest();
req.open("GET", Xrm.Page.context.getClientUrl() + "/api/data/v9.1/contacts(39a4e5b9-88df-e311-b8e5-6c3be5a8b200)?$select=jobtitle", false); //
req.setRequestHeader("OData-MaxVersion", "4.0");
req.setRequestHeader("OData-Version", "4.0");
req.setRequestHeader("Accept", "application/json");
req.setRequestHeader("Content-Type", "application/json; charset=utf-8");
req.setRequestHeader("Prefer", "odata.include-annotations=\"*\"");
req.onreadystatechange = function() {
    if (this.readyState === 4) {
        req.onreadystatechange = null;
        if (this.status === 200) {
            var result = JSON.parse(this.response);
            var jobtitle = result["jobtitle"];
            formcontext.getAttribute("new_job_tittle").setValue(jobtitle); //

        } else {
            Xrm.Utility.alertDialog(this.statusText);
        }
    }
};
req.send();
Now we have accordingly add the javascript file in web resources of CRM and called this function abc() on load of the form. Now as soon as you open the account page then you see the job title field is populated.
You can similarly manipulate any field value by it by writing whatever logic you want.
